
When the Collies Paragon first arrived, it was the middle of summer and stinking hot. Although I tried to print mainly in the evenings, sometimes it was 35C while I was in the studio. I was worried that the high temperatures would make printing difficult, but the press seemed to love it. The ink was almost fluid at times, and I didn't have to use much at all to get a good even coverage.
It's now winter, and I'm printing in temperatures of down to 3C or so. The ink takes a long time to warm up on the press, but still covers the ink disc evenly. However, I think some of my plate inking issues may be due to the cold temperatures (as well as other problems I'm addressing). It's quite thick and not very tacky at all, which makes it a little harder to spread and take to the plate.
Of course, humidity plays a big part too. In summer, if there's a storm hanging around, I won't even try to print. The plates curl up off the base, which present a danger of them being wrapped into the rollers. Now I'm avoiding printing during winter rain. Humidty causes grief for both plates and paper - letterforms can peel off the photopolymer, serifs can break off, and paper can swell, causing registration nightmares. If you have a job with tight registration, try to print it all in the one day, or on days with similar conditions.
So my preference is definitely summer printing. It may be stinking hot and you'll be sweating away, but the ink will distribute nicely. Another things I've noticed, in winter my hands get so cold that it's hard to grab paper as I feed it in and out of the press. At least in summer my hands are grippy.
:)
In an ideal world, I'd be setting up a more permanent home for Poppy, with ample space, lots of natural lighting, shelves upon shelves for storage, and a dehumidifier and heater. I can dream, can't I?
Showing posts with label troubleshooting. Show all posts
Showing posts with label troubleshooting. Show all posts
Wednesday, July 2, 2008

Monday, June 30, 2008
Busy busy
Thanks to the genius of my husband, the website now works in every available browser. But of course, let me know if you pick any problems.
We've had a great response from the launch of the website, with many people contacting us with comments or quote requests.
This week I'm busy printing business cards and hopefully a couple of illustrations. A designer in Melbourne has created the most gorgeous bird illustration, and I can't wait to show you the printed piece... but I'll have to hurry up and get the plates made first, won't I?
Also, I've been having a recurring inking issue with the photopolymer plates, which may be solved by using roller bearers. So this week I hope to unlock my chase (sigh, it's so perfectly set up now that I don't want to move it again) and lock in some bearers... If I can find some. Roller bearers help the rollers to touch the plates at exactly type high, which inks them up evenly. I have a suspicion that the rails on my press have worn and are no longer perfectly flat, so bearers would help a lot.
We've had a great response from the launch of the website, with many people contacting us with comments or quote requests.
This week I'm busy printing business cards and hopefully a couple of illustrations. A designer in Melbourne has created the most gorgeous bird illustration, and I can't wait to show you the printed piece... but I'll have to hurry up and get the plates made first, won't I?
Also, I've been having a recurring inking issue with the photopolymer plates, which may be solved by using roller bearers. So this week I hope to unlock my chase (sigh, it's so perfectly set up now that I don't want to move it again) and lock in some bearers... If I can find some. Roller bearers help the rollers to touch the plates at exactly type high, which inks them up evenly. I have a suspicion that the rails on my press have worn and are no longer perfectly flat, so bearers would help a lot.
Sunday, June 15, 2008
Today's tip
My tip for today: when you're printing something small that requires a bleed (and therefore trimming afterwards on the guillo), add a bit more bleed than you think you'll need.
If you do this and you stuff up your guillotining, you'll then be able to fix it because you have the extra space.
Printing Kate's cards today was already a nightmare because of inking issues that I've been having with the press for a while now (that's a whole other story), so imagine my relief when they were finally done and looking good. I wasn't so impressed when the paper slipped under the guillo and there was no way to rectify the problem. So I'll be reprinting the cards during the week!
Gotta learn the hard way sometimes :)
If you do this and you stuff up your guillotining, you'll then be able to fix it because you have the extra space.
Printing Kate's cards today was already a nightmare because of inking issues that I've been having with the press for a while now (that's a whole other story), so imagine my relief when they were finally done and looking good. I wasn't so impressed when the paper slipped under the guillo and there was no way to rectify the problem. So I'll be reprinting the cards during the week!
Gotta learn the hard way sometimes :)
Tuesday, March 25, 2008
Store in a dry place
Today's lesson is:
KEEP YOUR PLATES DRY.
This means, if your pressroom isn't completely weather-proof, don't store your plates in there, even for a few hours overnight.
It hasn't rained for a few weeks (Aussie droughts, sigh) so this hasn't really been an issue for me until today. It started raining during the night and hasn't stopped since. Most of my plates were tucked away, but the koi and dog plates (which I test printed yesterday afternoon) were left out on my desk. The very moist air got to them, and they curled up. The koi plate actually started breaking apart, so it's now useless.
I'm very disappointed, as I've really been looking forward to printing the koi. I always learn the hard way. Now I have to save up a bit of money to get them remade.
KEEP YOUR PLATES DRY.
This means, if your pressroom isn't completely weather-proof, don't store your plates in there, even for a few hours overnight.
It hasn't rained for a few weeks (Aussie droughts, sigh) so this hasn't really been an issue for me until today. It started raining during the night and hasn't stopped since. Most of my plates were tucked away, but the koi and dog plates (which I test printed yesterday afternoon) were left out on my desk. The very moist air got to them, and they curled up. The koi plate actually started breaking apart, so it's now useless.
I'm very disappointed, as I've really been looking forward to printing the koi. I always learn the hard way. Now I have to save up a bit of money to get them remade.
Monday, March 24, 2008
New plates
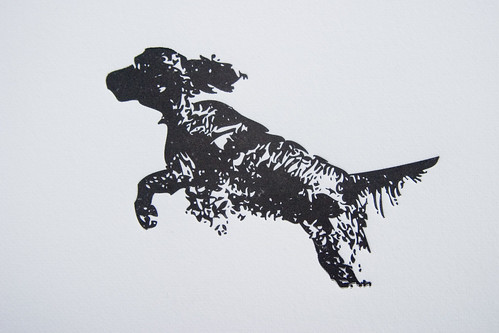
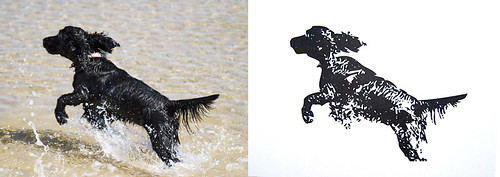
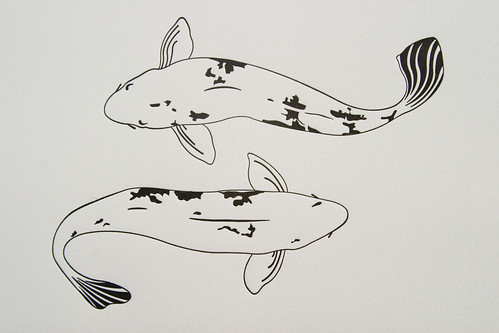
These are just a couple of my newest plates. I ran quick proofs of them today while I had ink on the press, and can't wait to print the final versions. The dog print is taken from a photo of my dog having a great time at the beach on Valentine's Day 2007. The koi will be a two colour limited edition art print, which I'm very excited about.
Today I finally realised that the reason why I've been having so much inking trouble is almost entirely because I've been using slippery PVC tape on the rails. Changing to masking tape today solved all my problems. :)
Saturday, March 22, 2008
Wobbly press
The press was unlevel by a slight amount, which I think was causing two moving parts to clunk instead of glide past eachother (like my technical language there?). So my husband and I jacked the press up and put some wood under it to level it out. Ok, so it's level now.
I start the motor up, but it's now all out of alignment, so we have to wiggle the press forward again. There's just something so unnatural about rocking a 800kg printing press to get it to move forward about 10mm.
Start the motor up again. It works, everything moves as it should. Except the press itself, which now wobbles a bit when I'm printing. Damnit.
I give up. I'm having lunch.
I start the motor up, but it's now all out of alignment, so we have to wiggle the press forward again. There's just something so unnatural about rocking a 800kg printing press to get it to move forward about 10mm.
Start the motor up again. It works, everything moves as it should. Except the press itself, which now wobbles a bit when I'm printing. Damnit.
I give up. I'm having lunch.
Friday, March 21, 2008
Varied Noisy - 1st colour
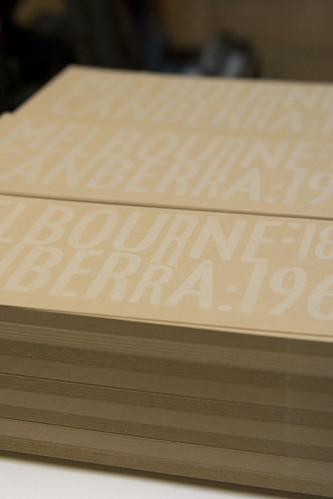

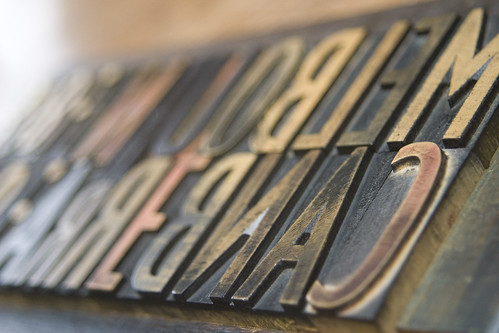
Just a sneak preview of what I'm working on at the moment - 400 x 2 colour postcards printed in wood and metal type. Second and final colour will be printed tomorrow morning, so stay tuned for the final product. But first, a little about my day...
Wood type and I are not friends.
Oh, it's such a lovely result when the prints are done, but the makeready is unbelievable. Or maybe I'm just exceptionally bad at working with wood type. Either way, I spent a good few hours today adding packing to behind the worn wooden letters to get them to type high. That's fine, I actually like doing that, but when every attempt gets a completely different result? Augh.
So it took me a long time to realise that each time I loosened the quoins, took out a letter, packed it, replaced it again and tightened the quoin, the pressure of tightening was causing the forme to bow just a little. I never overtighten the quoins, so it wasn't obvious at first. In the end, I placed a weight on the forme as I was tightening the quoins (making sure not to damage any type). Ok, problem fixed. From there, I ran a few (hundred) more proofs, every now and then having to stop and pack a letter which mysteriously shrank in height. After a while of doing this, I was able to predict how the letters moved in the forme after each impression. The pressure of each new print is enough to push some letters back (even if you thought it was flat on the table first) - causing them to 'mysteriously' shrink in height. So after a few impressions and tweaking, I had a good forme to print from.
PS. I'm on the hunt for a decent guillotine. I've been cutting paper by hand and sending bigger jobs to friends who can help, but I really think it's time to get one for myself. They can be so expensive so it's proving to be a challenge. Now, to ebay or not to ebay...
Tuesday, March 18, 2008
Solving inking problems
Apologies for those using slow internet, but it's been a while since I've put some photos up.
I had a serious printing session today. I've been having problems inking plates and was determined to get to the bottom of it. Here's what my prints were turning out like (click to enlarge):
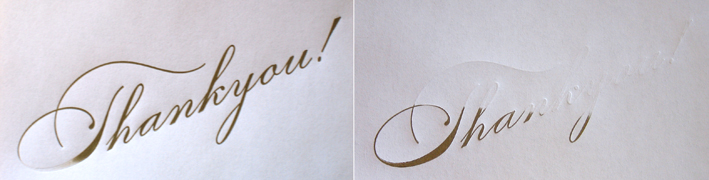
Either the ink cut-off midway, or there were bare strips. Such a basic printing issue, but no matter what I did I couldn't resolve it. So I bought new gloves that don't have any powder (to avoid trucks slipping on rails, or powder getting on rollers), and I clean everything up with turps and new rags: trucks, rollers, plates, base, rails and ink disc. This way I knew nothing had oil or powder on it. The trucks wouldn't slip on the rails or plate.
 These are my trucks, taken off the rollers to have a thorough clean. Below shows how they slide back and forth on the rollers (which they don't do on the press).
I had a serious printing session today. I've been having problems inking plates and was determined to get to the bottom of it. Here's what my prints were turning out like (click to enlarge):
Either the ink cut-off midway, or there were bare strips. Such a basic printing issue, but no matter what I did I couldn't resolve it. So I bought new gloves that don't have any powder (to avoid trucks slipping on rails, or powder getting on rollers), and I clean everything up with turps and new rags: trucks, rollers, plates, base, rails and ink disc. This way I knew nothing had oil or powder on it. The trucks wouldn't slip on the rails or plate.
These are my trucks, taken off the rollers to have a thorough clean. Below shows how they slide back and forth on the rollers (which they don't do on the press). 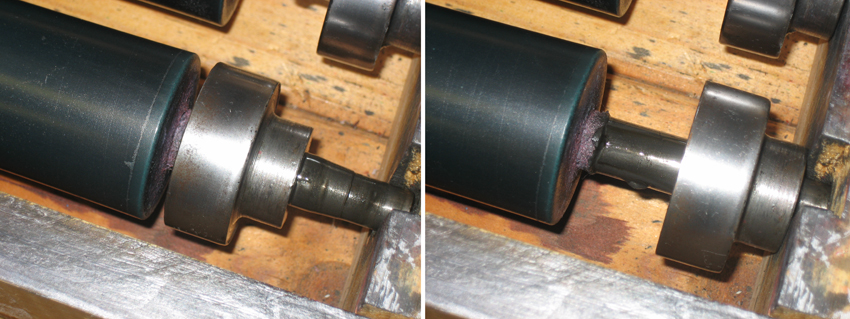
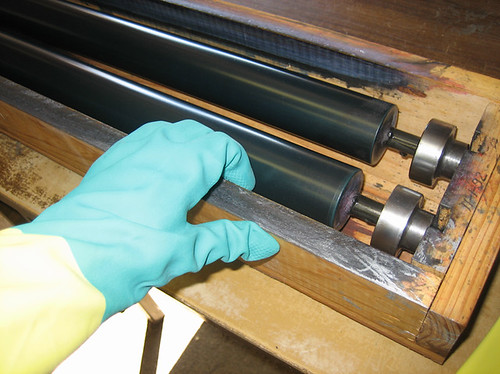
New gloves:
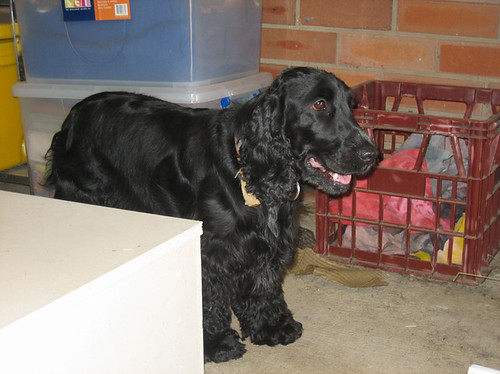
Taylor, the pressdog. She sleeps in her kennel next to the press, and on hot days she sits in her tub of water while I print.
My rails have vinyl tape wrapped tight at each end. I cleaned these off, and put the red PVC tape back on, as I've had set up for a while.

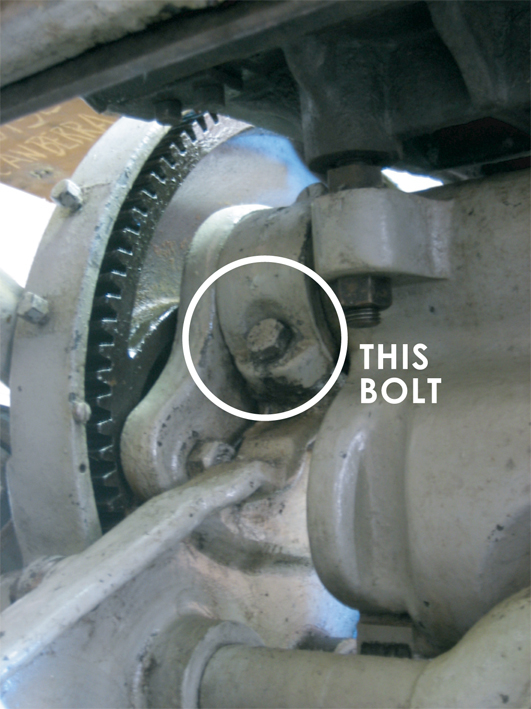
I recently found a large bolt that was loose as well, so I got right under the press and tightened it up. I ended up looking for it when the press started clunking on each impression. If this happens, firstly check to make sure that you haven't over-packed the platen. These presses are pretty hardy, but you don't want to strain them too much. Hard packing is optimal. Lots of soft packing just allow the type/plate to create an emboss on the back.
Cleaning everything thoroughly to remove oil, ink and dust, as well as readjusting the tape on my rails fixed my printing issues.
So if you are having trouble getting the rollers to ink up your plate, you need to check:
- rollers are level their entire length, preferably with calipers,
- plate and base are flat,
- base is locked into chase flat (not one side higher or lower than other),
- tape on rails is at proper height and are free of debris and oil, and
- trucks are free of debris and oil.
Of course there are probably a dozen other things, but I'm still learning that myself, too.
I have a lot of people asking me about uneven inking problems on tabletop presses. This is even tricker to troubleshoot because of how easily the impression knobs can be adjusted. This old posting might be of help.
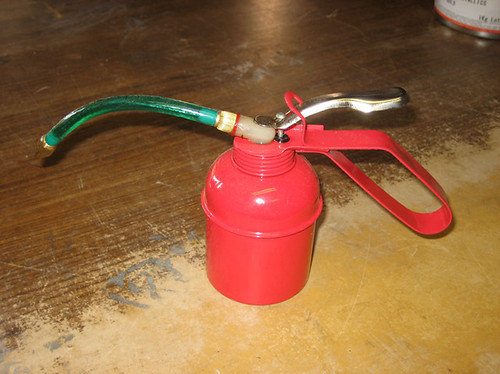
More photos. This is my oilcan. Not terribly exciting, but I highly recommend you aquire a good one if you have a standing press. I can usually find between 35-42 oil holes on the press, and some of them are quite hard to get at.
I bought a new pot o' gold today (wow, if only it were that easy). The exact gold that I was looking for was out of stock at Prestons, so I grabbed this Pantone 871 instead. Not really happy with how it turned out on my stock, it's very dull, more so than the silver is.
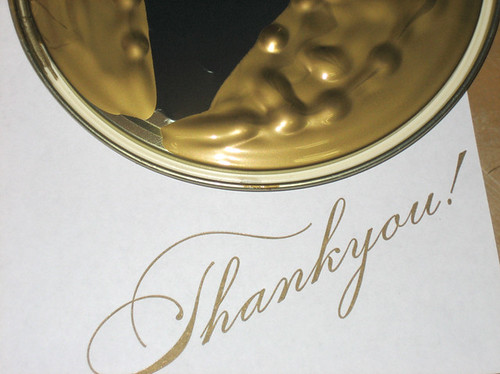
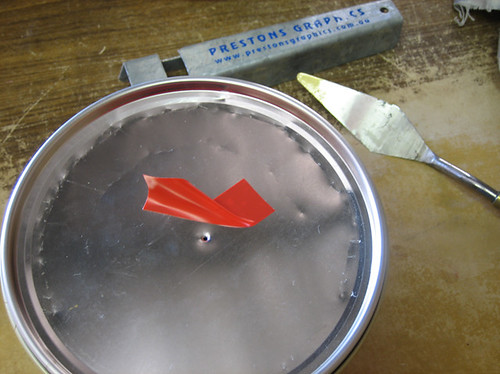
I learnt today that if you tap a hole in the middle of the lid, it's easier to remove it. When the lid is on, just put a bit of tape over it.
The gold looked great on the press:

Lastly, a big shoutout to Sarah in Sydney who rang today, Gina in Canada who's bought out my etsy shop (and I've already had people asking Where did they all go??), Donna in Brooklyn who I'm printing business cards for, and Helen from Pepperina Press who helped me last night on etsy.
Monday, November 26, 2007
New base!
I finally got to pick it up today: my new metal base! I've never been so excited about a lump of metal before. $100 from a local metal machinist, and he assures me it's even and ready to go. He's also offered to help out with anything that I need that's metal - which might come in handy with the auto-rotating mechanism on my ink disc. He reckons he could even build me a platen press from scratch if he had something to copy from... but I don't exactly have that much money!
Behold it's shiny-ness!

So yes, all very exciting. This is the first positive in a few days. I've been feeling a little unsure about where this is all taking me.
Things on my mind:
Behold it's shiny-ness!
So yes, all very exciting. This is the first positive in a few days. I've been feeling a little unsure about where this is all taking me.
Things on my mind:
- Will I ever get a decent deboss with my little Adana? Is it a polymer problem?
- Is it possible to start a business with a tabletop press, or would I need to find a bigger press, like a C&P?
- Is it just me, or is the hobby/art/business of letterpress mostly about troubleshooting?!
- Am I using too much ink or too little? I know using less is best, as long as there is even coverage, but so far only heavy ink is working for me. I don't like the feel of it when it dries. It looks more like a lino print.
- Will it ever get to a point where I find the sweet spot and then the next 100 prints look just as good, instead of one good, 5 bad, 2 good, 5 bad...?
Saturday, November 3, 2007
Uneven base
Ok, so it's the base that's uneven. It sinks slightly in the middle. I borrowed my brother's calipers (which are so fantastic, I've just bought a set on ebay), and found a height inconsistency of 1.04 mm.
Would love to buy a proper base, but I just found out that I finish my job in 4 weeks, so financially, it's just not going to happen at this stage. So for now, I have to work with what I've got. I spent a night sanding the high points of the base down, measuring every 0.01 of a millimetre. Works much better, but still far from perfect.
First run from yesterday, print now mounted with spray adhesive, printed with unmixed Pantone Red:
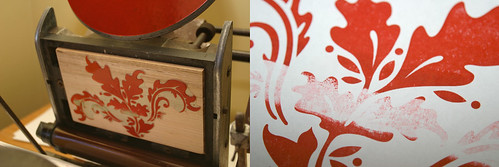 I'm happy enough that it's a clearly defined low area. Much better than being a few areas. Just to make sure it's definetly the base and nothing else, I temporarily pasted paper strips behind the patch, then did a second run:
 So it's definetly the base.
Spent a bit more time yesterday making it a less dodgy paper fix, so I could get a little closer to printing the actual cards (yes that's right, 3 colours in one day!). I still have a problem spot, but it's not base-related this time. Low point on the photopolymer?
 And here's where I'm up to. Still patchy, and some uneven inking to boot, but it's getting better each attempt:
Would love to buy a proper base, but I just found out that I finish my job in 4 weeks, so financially, it's just not going to happen at this stage. So for now, I have to work with what I've got. I spent a night sanding the high points of the base down, measuring every 0.01 of a millimetre. Works much better, but still far from perfect.
First run from yesterday, print now mounted with spray adhesive, printed with unmixed Pantone Red:
I'm happy enough that it's a clearly defined low area. Much better than being a few areas. Just to make sure it's definetly the base and nothing else, I temporarily pasted paper strips behind the patch, then did a second run:So it's definetly the base.Spent a bit more time yesterday making it a less dodgy paper fix, so I could get a little closer to printing the actual cards (yes that's right, 3 colours in one day!). I still have a problem spot, but it's not base-related this time. Low point on the photopolymer?
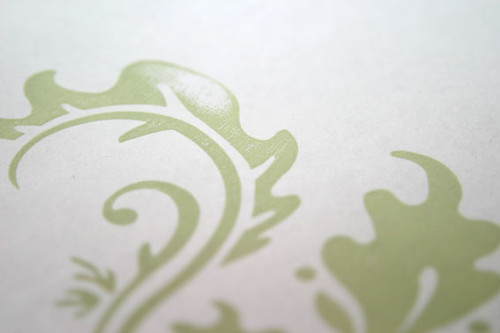 Also, still working on getting just the right green to match the sample from the bridesmaid's dress (that's the sample up the top of the pic):
And here's where I'm up to. Still patchy, and some uneven inking to boot, but it's getting better each attempt: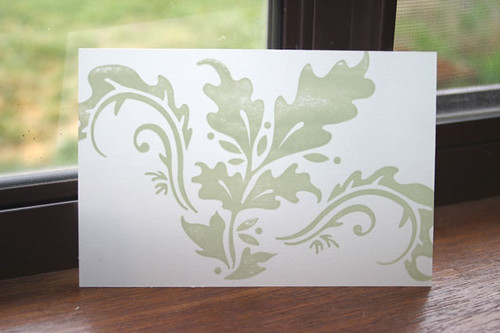 Problem with this print is that even though the ink is quite heavy, it's still very patchy when it was more even in earlier prints. Augh, can't win. Can't get any bite in the paper either.
I've got a whole day to work on it again now (and if I can't find a job in the next 4 weeks, I'll have 7 full days a week to work on it... sigh).
Tuesday, October 30, 2007
Problems
Having problems printing. I've just spent two nights trying to print from my first solid area plate, but having the same recurring problem that I've been having since I first put ink on the press.
The issue is that an area the length of the plate and one inch high is not inking. If I rotate the rollers 180 degrees, the whole plate inks up again, but after one or two prints, resorts to having an uninked strip again. It's not always the same area. It's less noticeable with line art.
At first, I thought it was that the rollers were sliding over that spot rather than rolling over it. I checked to make sure that the trunks were free of grease, and that the tracks were also clean.
Then I thought that it was because the rollers weren't being completely covered in ink as they ran over the ink disc -- that they didn't complete a full rotation over the ink, and therefore couldn't fully ink the plate.
My fiancee discovered that one of the tracks wasn't 100% straight. So we taped it up until it was, but that made no difference either.
Only rotating the rollers a little by hand, and then continuing the cycle seems to ink the plate up evenly, though only for a couple of prints.
Our best guess so far is that the rollers' axis has a bow in it. If this is the case, it's bad news.
I've put in so much work to get this far, and it's really disheartening to discover something like this. I have no idea where to get new complete rubber rollers, and even if I did, it still puts my wedding stationery back a few weeks. It's so frustrating.
I threw out most of the prints before realising I should photograph them, but here's a few pics:
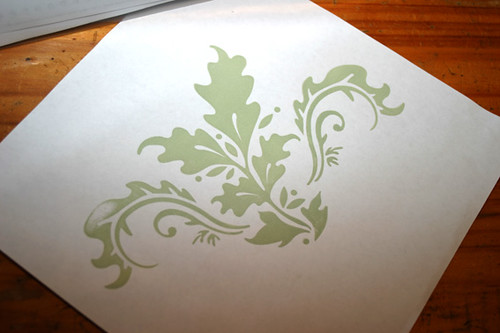 Best print from last night. I ran the ink very heavy, had just a kiss impression to the plate, and rotated the rollers by hand after every print.
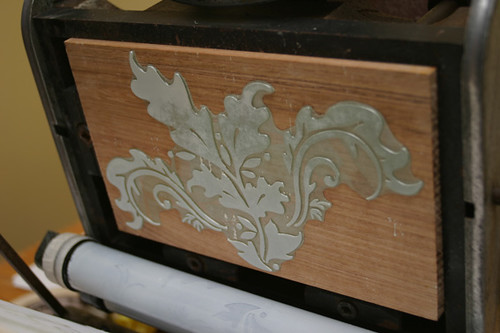 The plate tonight. Not a great example, but you can see the uneven ink distribution on the plate across one section. Rotating the rollers by hand fixed this for a couple of prints.
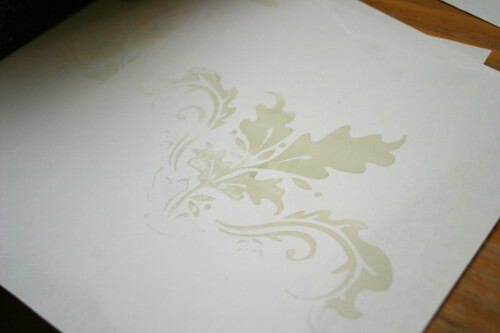 Example of a dodgy print from tonight. Notice the line of absent ink halfway down the print.
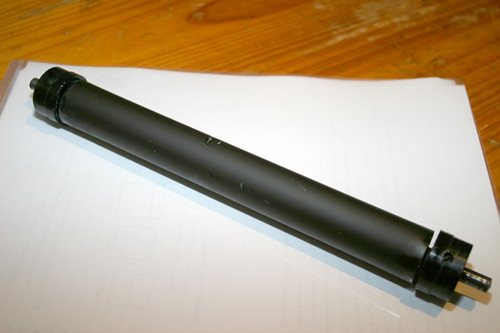 One of my rollers during the cleaning process. Both of the rollers for my eight-five have a few knicks in them which, surprisingly, haven't seemed to produce 'holes' in prints.
&Duck mentioned in the previous post's comments that double sided tape can cause problems and that spray adhesive is a better idea (which I'll be doing from now on), but after fiddling with this plate, I don't believe that's the cause of my inking problems.
Any suggestions would be appreciated. I'm at a loss here.
The issue is that an area the length of the plate and one inch high is not inking. If I rotate the rollers 180 degrees, the whole plate inks up again, but after one or two prints, resorts to having an uninked strip again. It's not always the same area. It's less noticeable with line art.
At first, I thought it was that the rollers were sliding over that spot rather than rolling over it. I checked to make sure that the trunks were free of grease, and that the tracks were also clean.
Then I thought that it was because the rollers weren't being completely covered in ink as they ran over the ink disc -- that they didn't complete a full rotation over the ink, and therefore couldn't fully ink the plate.
My fiancee discovered that one of the tracks wasn't 100% straight. So we taped it up until it was, but that made no difference either.
Only rotating the rollers a little by hand, and then continuing the cycle seems to ink the plate up evenly, though only for a couple of prints.
Our best guess so far is that the rollers' axis has a bow in it. If this is the case, it's bad news.
I've put in so much work to get this far, and it's really disheartening to discover something like this. I have no idea where to get new complete rubber rollers, and even if I did, it still puts my wedding stationery back a few weeks. It's so frustrating.
I threw out most of the prints before realising I should photograph them, but here's a few pics:
Best print from last night. I ran the ink very heavy, had just a kiss impression to the plate, and rotated the rollers by hand after every print.The plate tonight. Not a great example, but you can see the uneven ink distribution on the plate across one section. Rotating the rollers by hand fixed this for a couple of prints.Example of a dodgy print from tonight. Notice the line of absent ink halfway down the print.One of my rollers during the cleaning process. Both of the rollers for my eight-five have a few knicks in them which, surprisingly, haven't seemed to produce 'holes' in prints.&Duck mentioned in the previous post's comments that double sided tape can cause problems and that spray adhesive is a better idea (which I'll be doing from now on), but after fiddling with this plate, I don't believe that's the cause of my inking problems.
Any suggestions would be appreciated. I'm at a loss here.
Subscribe to:
Posts (Atom)


