
The invites are split into these plates:
- Green pattern bar at top
- Main text
- Last 6 lines of text
- Little 8mm 'flourish' to break up text
- Large swirls over top pattern bar.
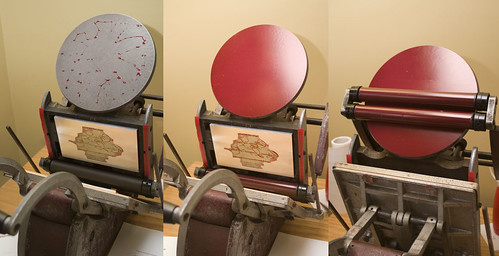
The first thing to go wrong was user error - the text plate was longer than my base. Yeah, I really thought that one through. Hence the cutting the text plate into 2 separate parts. The whole thing is only 2 colour, but 5 passes. Brilliant idea. I mean really, why make it simple when you can be this difficult?
The green bar had the most detail, but surprisingly printed easiest. The detail came out, and they looked great.
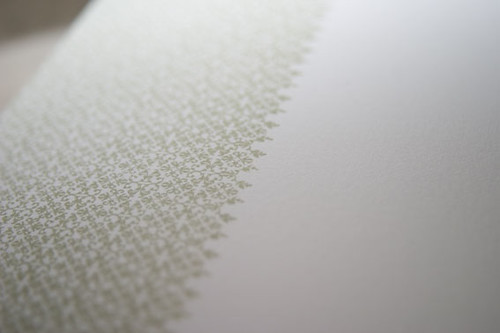
Then the main text. I didn't think this would be too difficult, but this is the stage where I realised that my rollers were uneven. They have a 0.3mm dip in the middle. So they inked up evenly, but left a random uninked line on my plate. Normally, turning the rollers a few degrees solves this problem, but it just wasn't happening this week.
 I got it done eventually, and then added the last 6 lines of text and the green flourish. I'm not happy with the quality of printing at all on these. I'm a perfectionist though, and my fiancee assures me they just have a quaint 'handmade' feel to them now.
The last few hours have been spent trying to print the swirl at the top. You might recall seeing the digital preview of this a couple of posts back. I had no luck with it. Heavy ink, light ink, rollers too high, rollers too low. For tonight, I am admitting defeat. We're looking into other design options now. I have a small version of the swirl that I might use instead. Less surface area. Will try in the morning.
 Things I've learnt:
- Don't expect to get an impression with an Adana. If you do, bonus.
- Don't decide to print your own deep impression wedding invites without first understanding Point 1.
- All the problems I was having with the wood base a few weeks ago? Yeah, that wasn't actually the base causing all those problems afterall. It's my rollers. They're not even. They need replacing. This is a bad thing to discover as you start to print wedding invites on a very short timeline.
- You need to respect the age of a press like this. It will be old, and may have travelled far and wide. It will have character. This can be good or bad. Either way, it is still a beautiful machine.
- My new metal base is the bees knees. It is shiny, and even, and perfect. Plates stick to it with just a little spray adhesive and don't curl up if the weather gets hot. It is so easy to clean up.
- Nail polish remover - now an essential part of my clean-up process. A little nail polish remover on a cotton bud cleans up ink and spray adhesive easily. It evaporates quickly, so the base and plates are ready to go in seconds after cleaning. The fumes don't hang around like kerosene. It doesn't eat photopolymer plates. Only use it for little touch-ups, and cleaning off spray adhesive though. Oil or kero for main cleanup of press and rollers still.
Ok, I think that covers it. Will try the alternative design tomorrow and post the results.


2 comments:
Hi,
Here's a tip in the Adana 8x5 instruction booklet that might help your problem with the rollers for a while.
"After prolonged use the roller composition will tend to shrink slightly and will no longer contact the type face. When this happens the life of the rollers can be extended by reversing the position of the nylon runners so that they bear on their smaller diameter. Ensure that all four runners are reversed."
I noticed your runners are still running on the larger diameter. So take your runners off, flip them, and put them back on. The smaller diameter will allow the rollers to have more contact with the type.
Hope that helps! Annie:-)
Also, don't ever expect absolute perfection using old technology. Otherwise you might as well have just used this money to get an offset invitation printed with a diecut embossing. Be proud of the hand-madeness, truly.
And yes, don't plan on big area of flat colour until you've mastered your press. That's why the lattice worked so well!
Again: you are doing so well! And proving me wrong that equipment is hard to find! Or else you're the luckiest girl in Australia!
Post a Comment